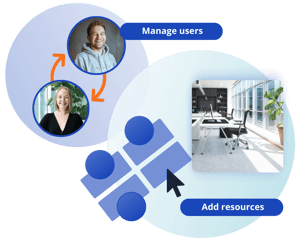
Manage users manually, through lists, or via one of our numerous integrations, such as Entra ID or Google Workspace. Allocate roles and individual permissions.
Upload floor plans, designate bookable desks, rooms, zones, and parking areas. With desk.ly, you can configure your office spaces to suit your specific needs.
Tip: Make use of our floor plan service!
desk.ly adapts to your working style with maximum flexibility. Set rules for prioritised bookings, how far in advance bookings can be made, check-in at the desk, or even anonymous bookings.
Enable anonymous bookings—company-wide or allow your employees to decide individually.
Create a familiar setting in your booking software. Customise desk.ly using the white label feature in your corporate colours.
Setting up desk.ly couldn't be easier: save time with our integrations by automating user management and permission groups.
Analyse the usage of your office spaces and identify room for workplace optimisation.
Optimise your regular shopping or cleaning services based on demand and save money.
In the Admin Dashboard, you can see how many of your licences you are currently using. This simplifies user management and the onboarding of new colleagues.
Use filters to evaluate the usage of individual resource types, such as meeting rooms or parking spaces.
Transfer your booking data into your systems using the RESTful API and conduct your own analyses.
Assigns the analyst role to individual users, granting them access to essential booking data.
Manage your office simply & transparently
Set up desk.ly according to your rules and get more out of your working environment.
Over 1,000 companies worldwide rely on desk.ly
Ready to go in just a few steps

Upload room plans and create workstations, meeting rooms and other resources directly on the map with just a few clicks.

With our integrations you can easily create all users at once and map your rights & roles in desk.ly.

Adapts perfectly to your organization: booking, display, anonymization and much more can be freely personalized.
Manage users manually, via lists or one of our many integrations, e.g. in Entra ID or Google Workspace. Assign roles and individual authorizations.
Upload room plans, define bookable spaces, zones and parking spaces. In desk.ly, you can configure office space entirely according to your needs.
Tip: Use our room plan service!
Adapt desk.ly as flexibly as possible to your way of working. Define rules for prioritized booking, how far in advance you can book, check-in at the desk or even anonymous bookings.
Enable anonymous bookings - company-wide or let your employees decide individually.
Create a familiar environment. Design desk.ly with the white label function in your company colors.
Save time with our integrations and automate user management and authorization groups.


For your security desk.ly is GDPR compliant & ISO 27001 certified
Fast onboarding & ongoing advice
With desk.ly, you can get started without any headaches. Your personal Customer Success Manager will support you during setup and onboarding and provide you with ongoing advice.
 Fast problem solving: You can reach real people who can really help you via our website chat.
.png?width=300&name=Icon%20Designs%20Relaunch%20(2).png)
Start strong—with desk.ly
Our onboarding videos help you set up your new booking software. They walk you through the initial steps and introduce you to the admin area. Have a look now!


Ready to go in just 2 weeks
mobile.de shows how quickly and easily the introduction of new workplace management software can succeed. What led to success in just 14 days? Find out more in the interview!
To the success story.png?width=300&name=Headergrafiken_54%20(43).png)