.svg)
With guest booking, your colleagues can book desks, meeting rooms and parking spaces for external visitors too — for example, for candidates, auditors, coaches or clients. To make this work for your company, you need to set the feature up once.
In this article:
- How do you set up guest booking?
- Setting the anonymisation period for guest bookings
- Adding your own privacy policy
- Who is allowed to book for guests? (Permissions)
- The invitation email to guests
- Where can guest bookings be seen?
Tip: To find out how guest booking works day-to-day once it's set up, see the article How do I book for guests?
 Available from Enterprise and up. Please contact us to learn more about your upgrade options!
Setting it up in two steps
Guest booking is switched off by default. To let your colleagues use it, you first switch it on generally in the system settings, and then enable it for the locations you want.
-
Switch on guest booking in the system settings
Go to the system settings and then to the "Guest booking" section. Switch on the feature for your company. This is a prerequisite for enabling it at individual locations in the next step. -
Enable guest booking per location
Go to "Floor plans", select the relevant location, and switch on the "Guest booking" option there. You control this separately for each location — for example, enabling it only at locations that actually receive visitors.
As long as a location hasn't been enabled, the "Book for guest" option won't be available there in the booking window.
Here's a step-by-step recap:
Setting the anonymisation period for guest bookings
In the same "Guest booking" section of the system settings, you set how many days must pass before guest booking data is automatically anonymised.
- Choose a value between 2 and 1,000 days.
- This period applies independently of the standard retention period for regular bookings (usually 90 days) — so you can deliberately choose a different retention period for guest data, for example a shorter one.
Important: If you later extend the period, data that has already been anonymised will not be restored. The change only applies to future anonymisation runs.
Good to know: Separately from guest booking, Enterprise Plus customers can now also adjust the general anonymisation period for regular bookings themselves in the system settings, rather than contacting support. This is a separate setting that isn't guest-specific.
Adding your own privacy policy
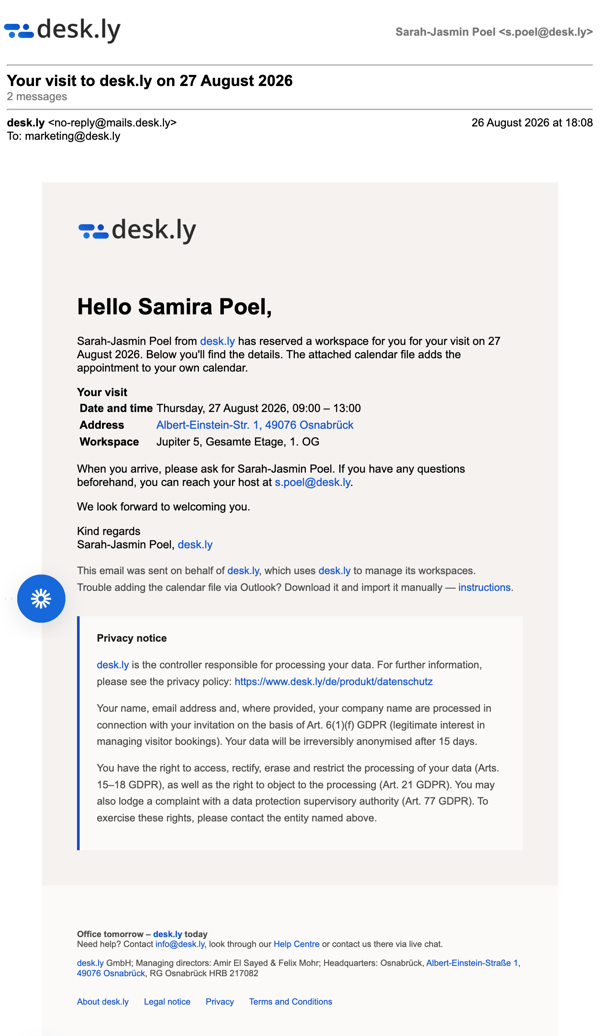
When guests receive their invitation, they haven't yet agreed to desk.ly's privacy policy. That's why the automatic invitation email always includes a privacy notice with a link.
By default, this links to desk.ly's privacy policy. We recommend replacing it in the "Guest booking" section of the system settings with a link to your own company's privacy policy, so your guests are informed about the terms that actually apply to them.
This recommendation doesn't replace a legal review. If in doubt, clarify company-specific data protection questions with your data protection officer.
Who is allowed to book for guests?
Once a location has been enabled, anyone who is generally permitted to book at that location can also book for guests — regardless of role or permission group.
The invitation email to guests
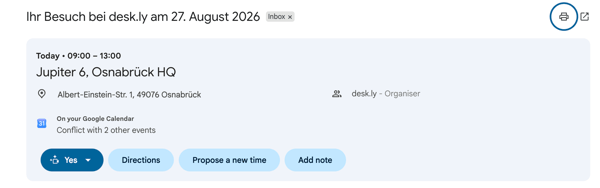
As soon as a guest booking is completed, the guest automatically receives an email with the key details of the appointment, along with a calendar invitation they can add to their own calendar.
The email template is standardised. However, there's one adjustment to make: exchange the standard URL to the desk.ly privacy policy with your own company's privacy policy URL.
A PDF attachment isn't possible. If you'd like to include additional information, you can instead link to your own page that includes further content alongside the privacy policy.
Here's an example of what the confirmation email looks like:
Where can guest bookings be seen?
In the admin area, guest bookings appear under "Bookings", where you can filter specifically for guest bookings via a dedicated source — as long as the data hasn't been anonymised yet.
For users, guest bookings appear as follows:

- For everyone: On the floor plan, guest bookings are marked with a "G" for "Guest".
- For everyone: Guest bookings also appear in the "Who's in the office?" view.
- For the host: In their own booking overview, the host who created the booking can view and edit their own guest bookings.
To find out how guest booking works for users, see the article How do I book for guests?